

How I do the animated avatar
I recently added a vtuber model to my videos, here's how, how much it costed and if it was worth it

A lot of people have asked about the VTuber (animated avatar) that I’m using on YouTube, so this is a full article on how I did it, how much it cost etc. If you’re not interested in this or how I get channel artwork in general just give this article a miss.
Hashtag The Brand
Even before I decided to make YouTube videos about hacking I knew I wanted to rebrand my online presence for my PhD. I saw a lot of fan art for a YouTuber I watched at the time and I really enjoyed the artist’s style, when I saw that they had commissions open I jumped at it. I really wanted something cartoony but not anime and something that actually looked like me. I didn’t really want to use an actual photo of me because I’m not particularly photogenic. Either way I ended up with my first avatar which I used for a really long time.
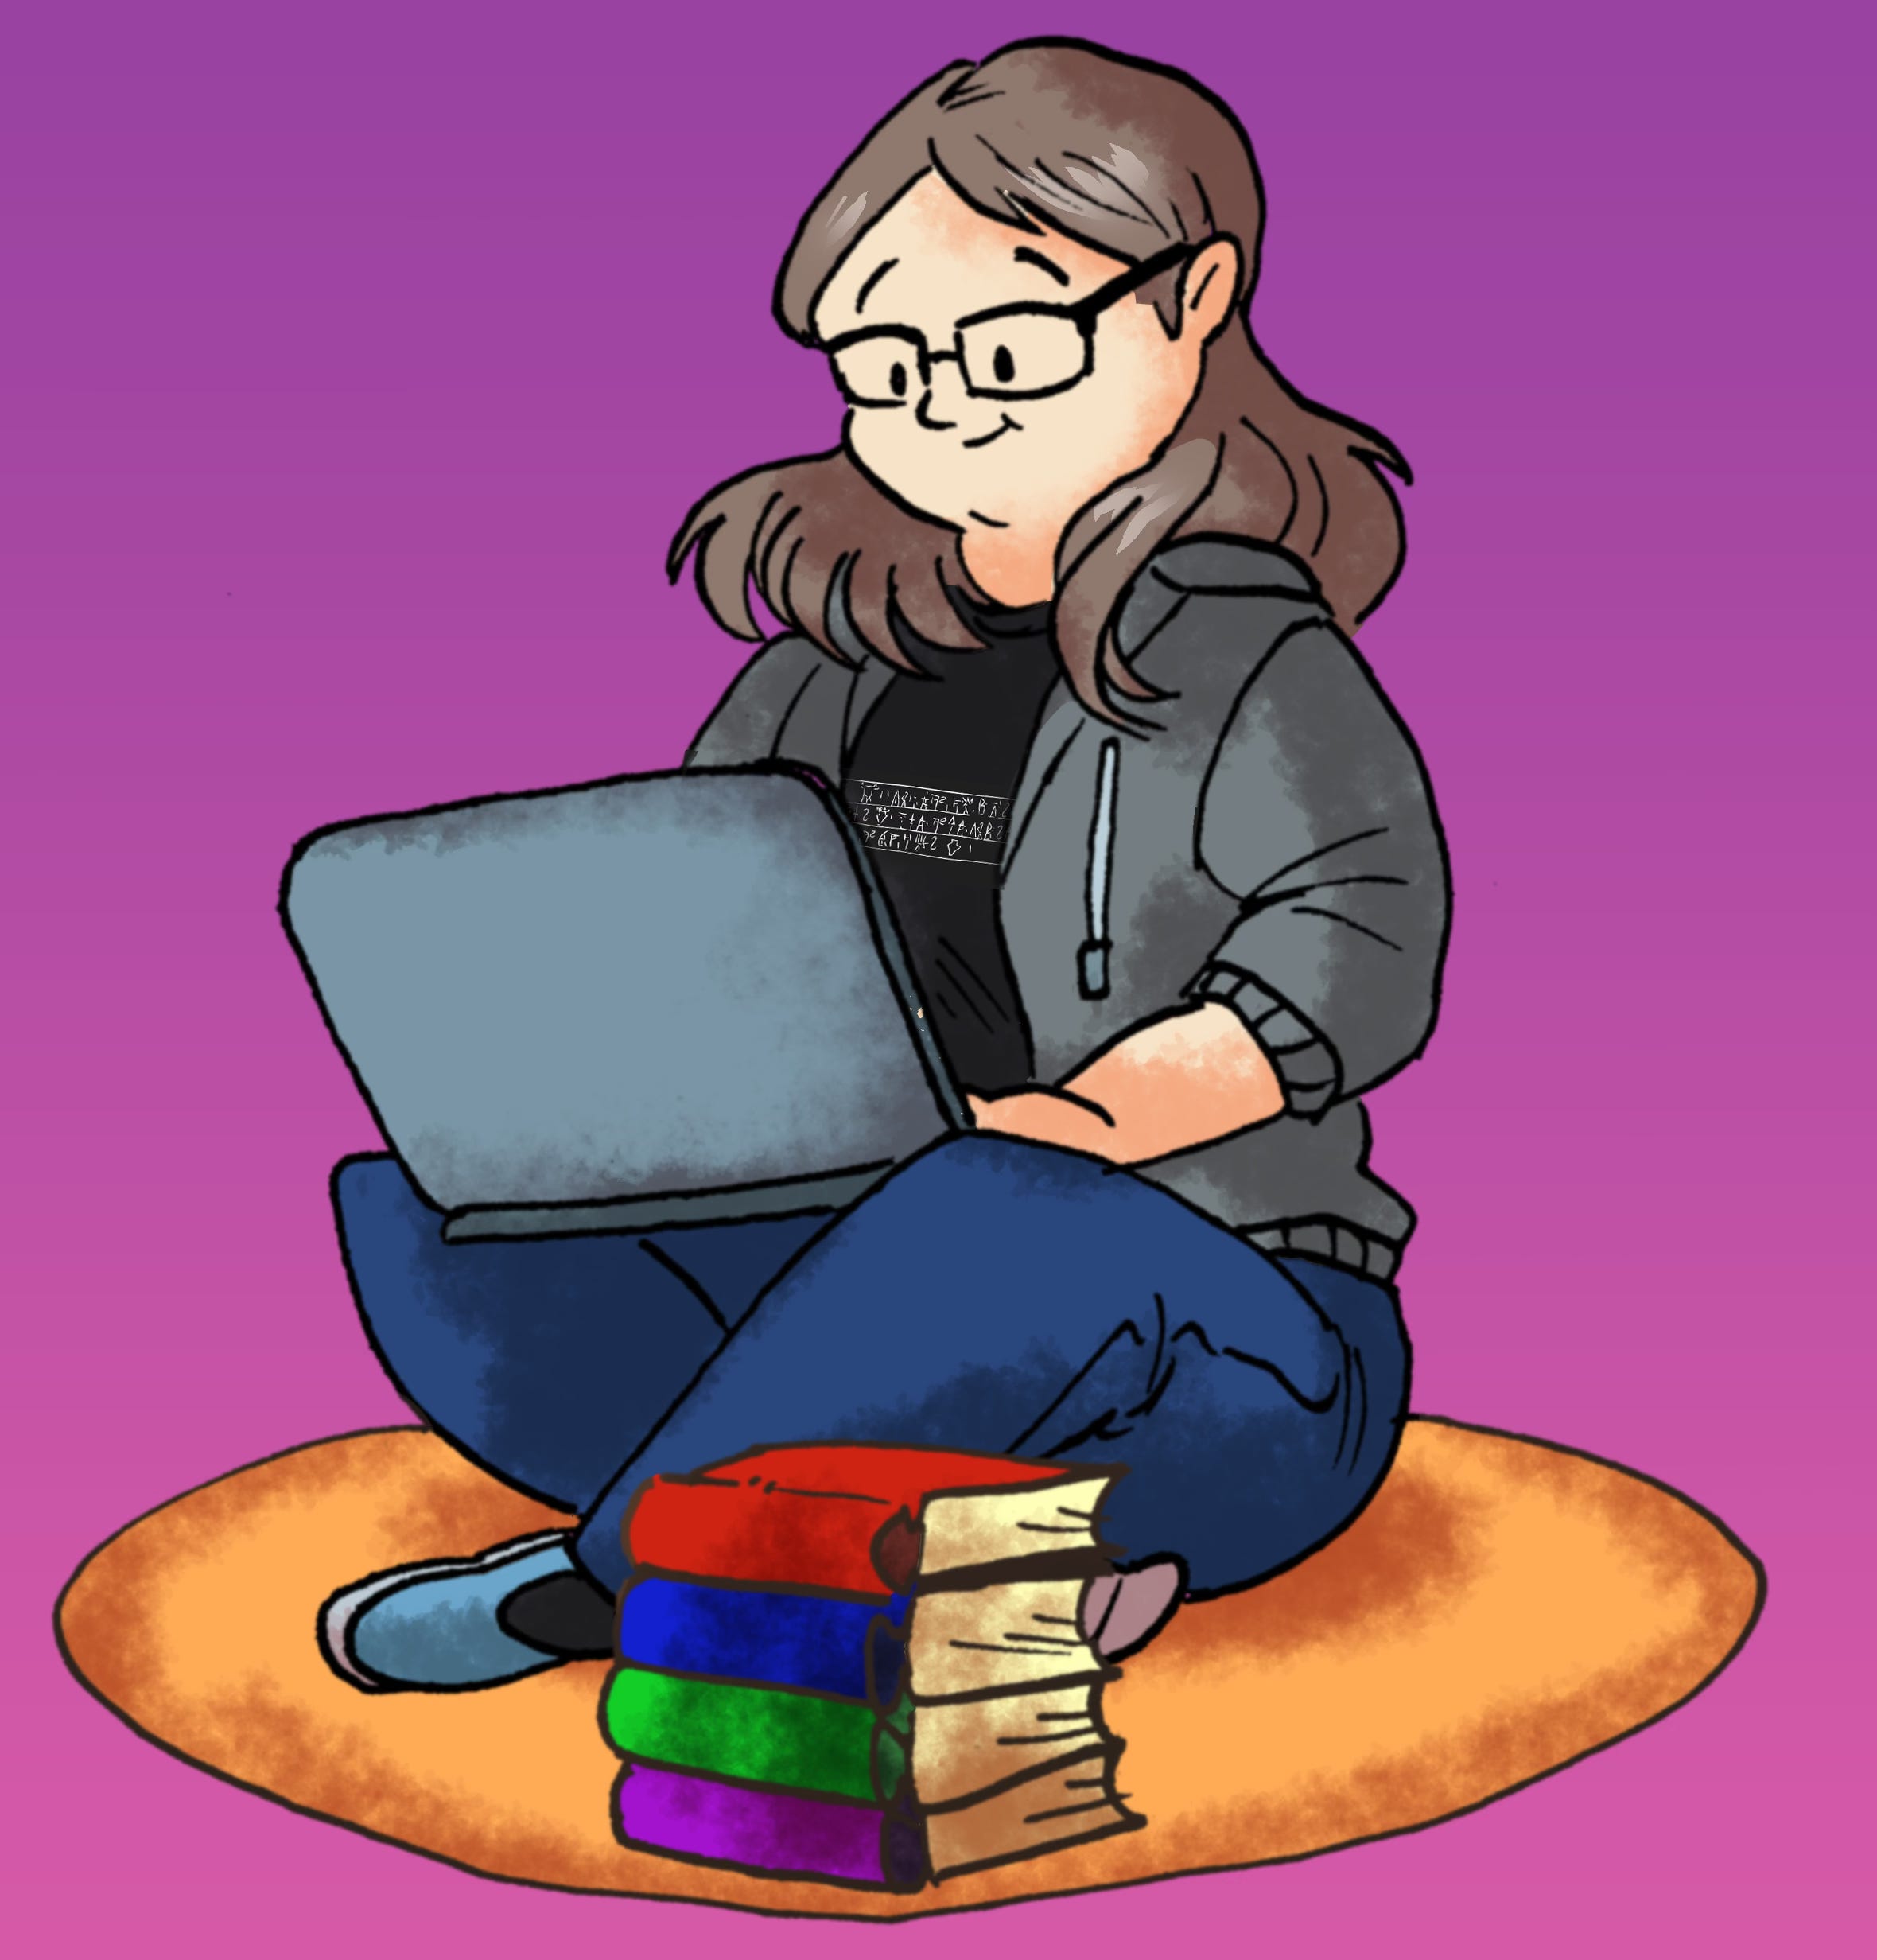
As YouTube picked up more this design wasn’t going to cut it, there are way too many colours and the lines are too small. Thankfully I had also improved in my own art so I ended up re-drawing my avatar to make it more swag friendly.
At the same time I also redrew my YouTube banner, from MS Paint into something a bit clearer. I really like the charm of MS Paint but again it’s hard to get it printed correctly.
So why a VTuber
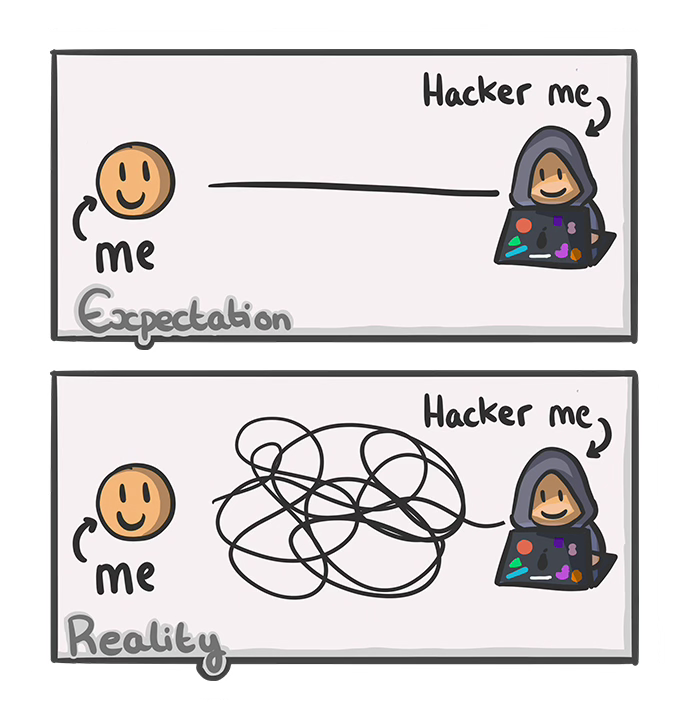
I experimented a lot with Face Cam on my videos, I know people prefer Face Cam and I think other creators (like NahamSec and LiveOverflow) use Face Cam to have a much more engaging video, but I always struggled with it. The size makes placing it on the screen with slides tricky, the camera would just break and just not work and honestly I didn’t think it added much to my videos.
I was mindlessly scrolling TikTok and I came across this creators videos, they talk a lot about how VTubing as an industry works, joining an agency? Becoming an idol?? Singing??? Anyway I knew I didn’t want that but I did think it could be an interesting way to add Face Cam to videos and do shorts without a proper video, makeup, lighting etc setup.
 Tiktok failed to load.
Enable 3rd party cookies or use another browser
PNGTuber
My initial experiments was using something called a PNGTuber, since I know nothing about making 3D figures BUT I can draw, I experimented with a program called Veado Tube, a list of mouth movements and ended up with the first prototype, but honestly it was very clear that it wasn’t quite what I wanted. I still think this is a great option if you draw your own artwork since you don’t need any skills just a mouth open, eyes open, mouth closed, eyes open, mouth closed, eyes open, and finally mouth closed, eyes closed. So 4 total images.
Live2D
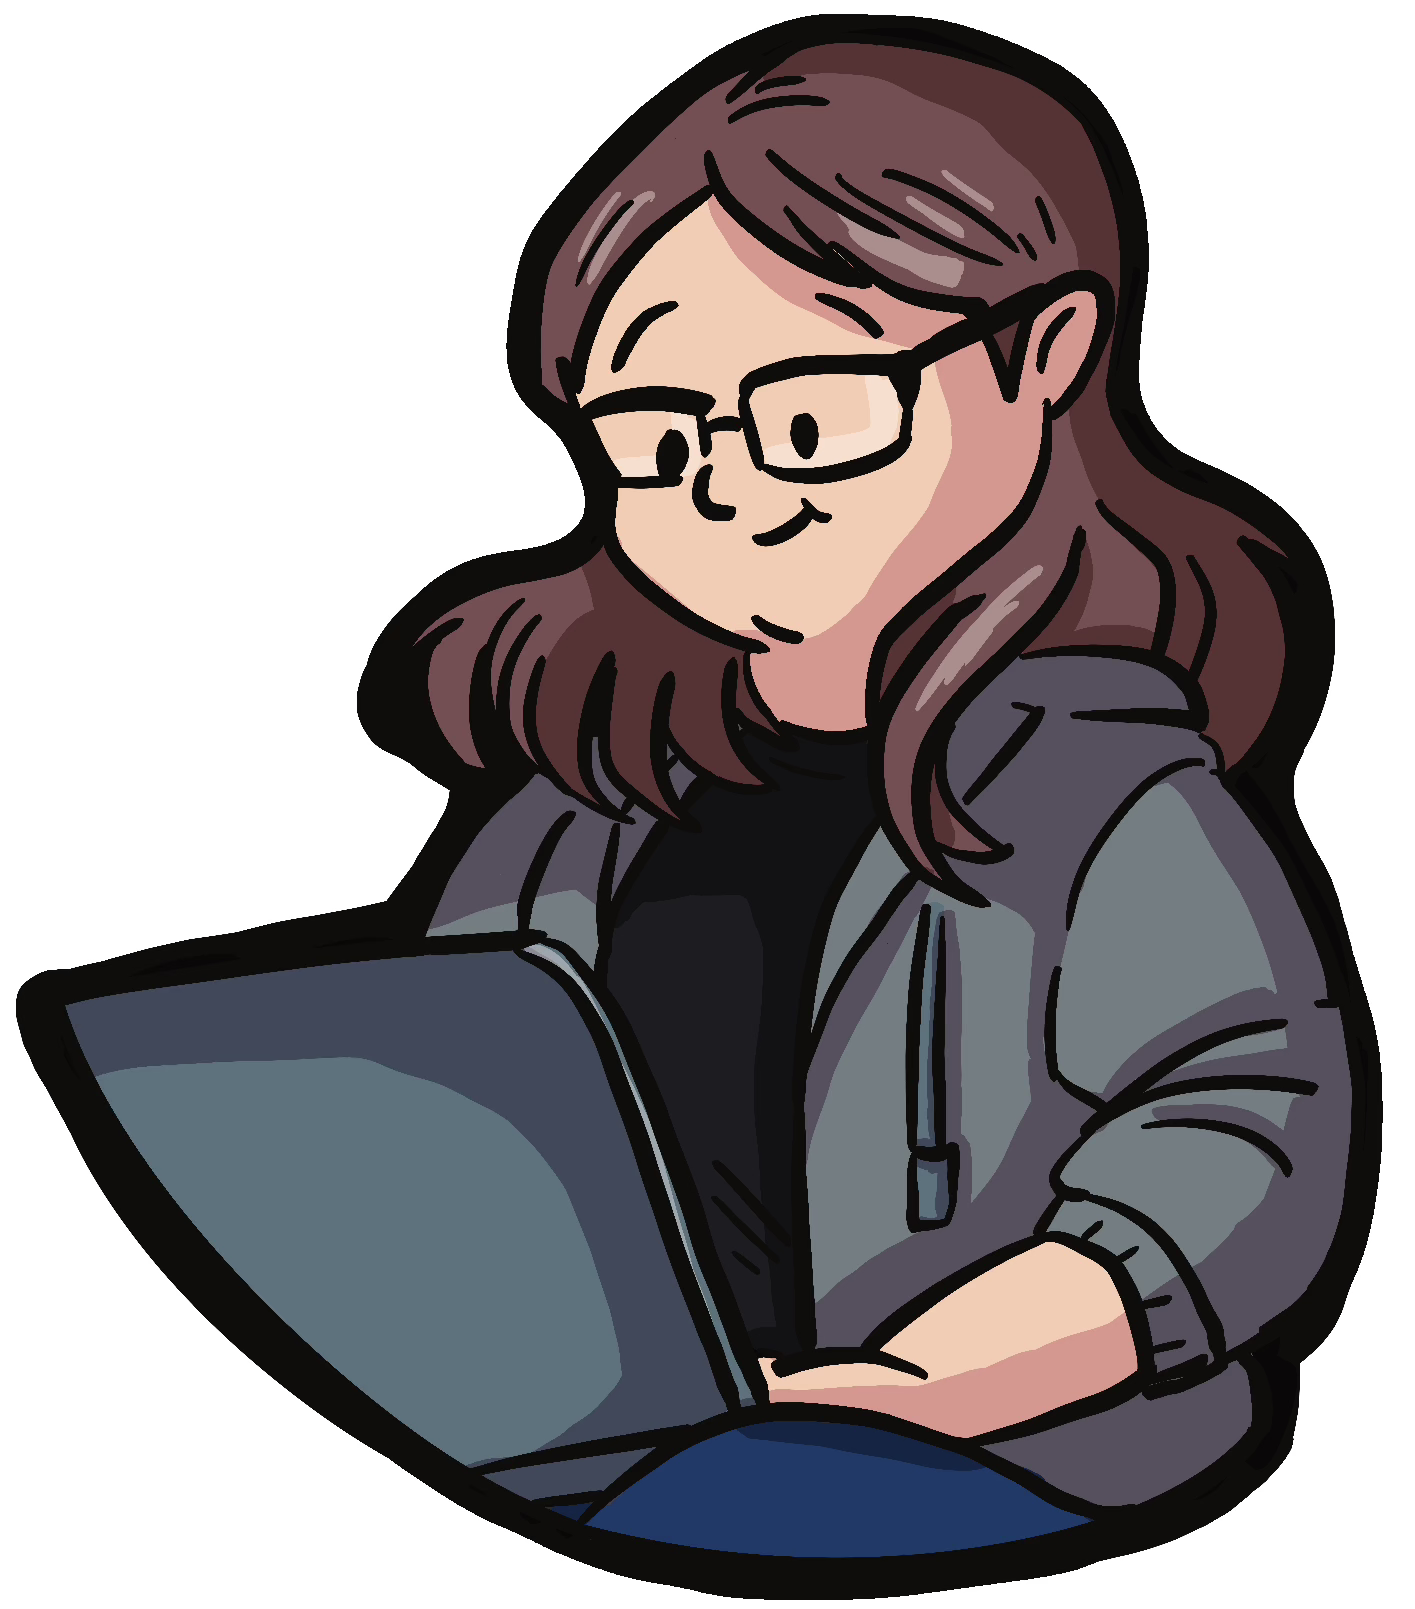
I decided to go for Live2D, I think I took one look at rigging and thought oh no that is way too complex, I’ll hire someone. If you’ve not seen a Live2D model before, essentially the artist draws the image, and then breaks it apart into individual layers so each element that they want to move is separated, before actually programming all the animation elements together.

For the animation they might choose to make some elements bounce, or warp, or animate, something as simple as a blink can be a pain to animate naturally. There are these 2 skills the actual artwork and the rigging, and they are sometimes done by the same person and sometimes not.

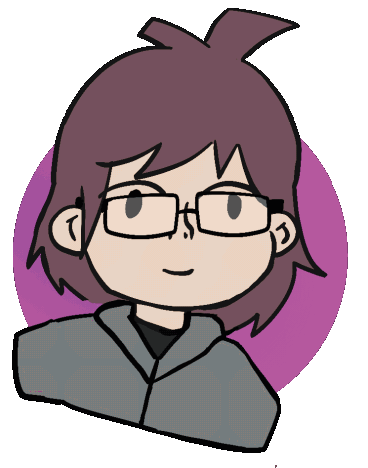
So because I knew nothing apart from this would be a difficult thing for me to learn I ended up on the Live2D Discord server, they have a market place and I placed an add using my existing artwork looking for something similar. I started getting interest quickly but found that most artists had a more anime style, so it look a little while before I found an artist who’d done more cartoony style work, and bam I ended up with Airy (who still has commissions open!). Airy worked with me on what expressions I wanted, and I had also requested some animations (I actually ended up commissioning them AGAIN for another animation of hands). I was really clear that I wanted something that looked like my current avatar for the sake of the brand. This cost £550-ish, for the model, expressions and animation.


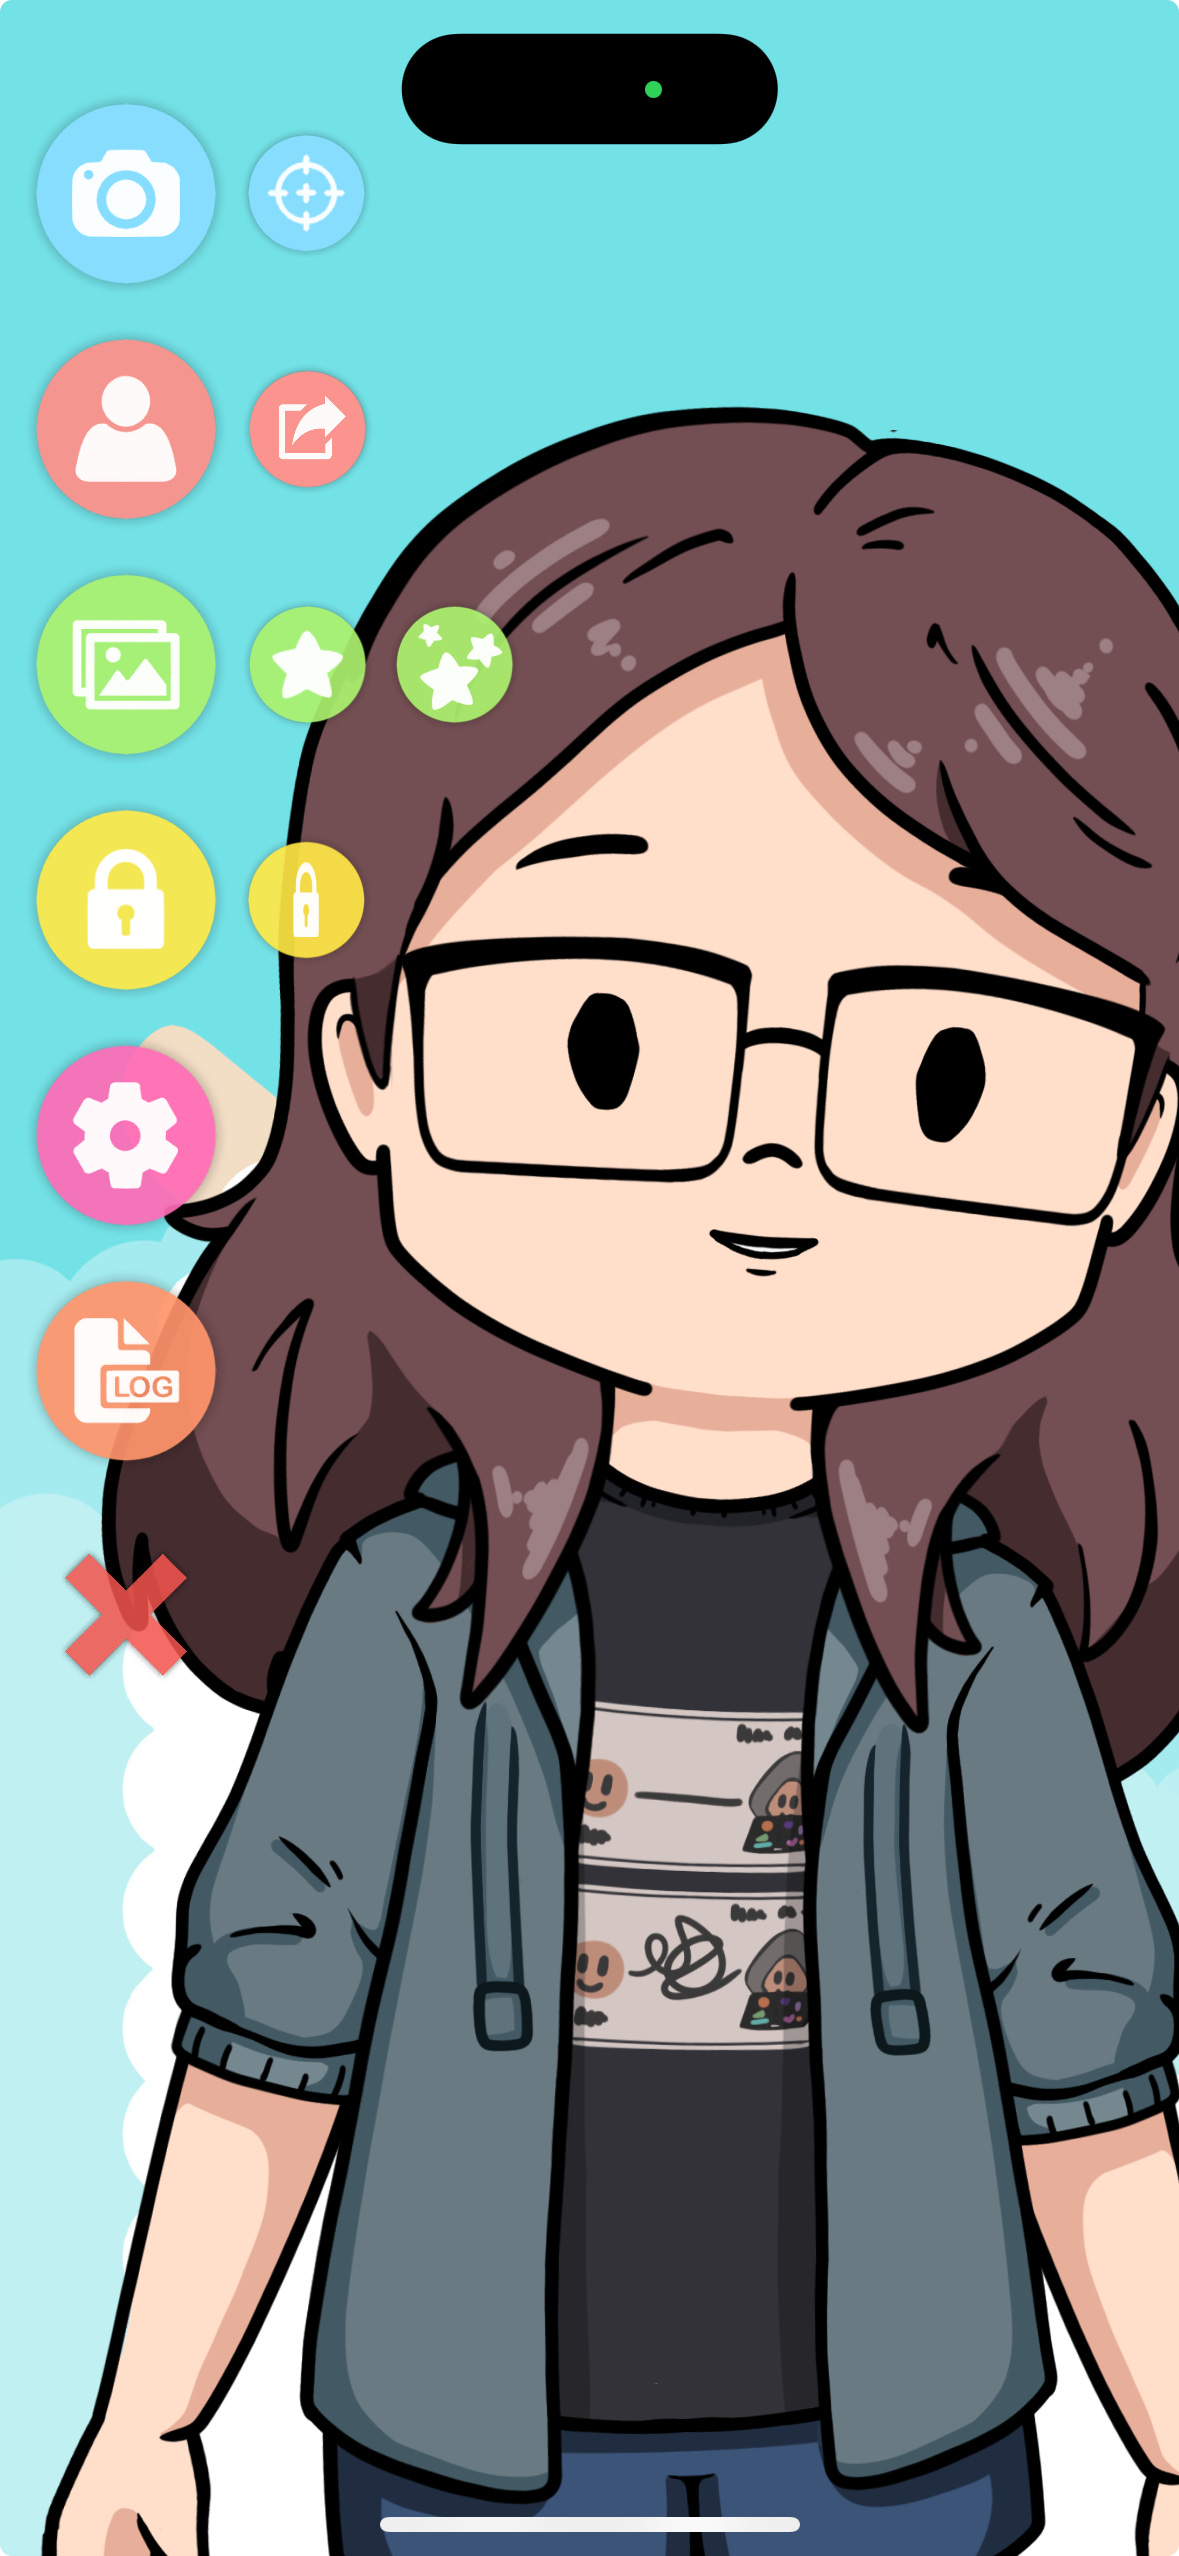
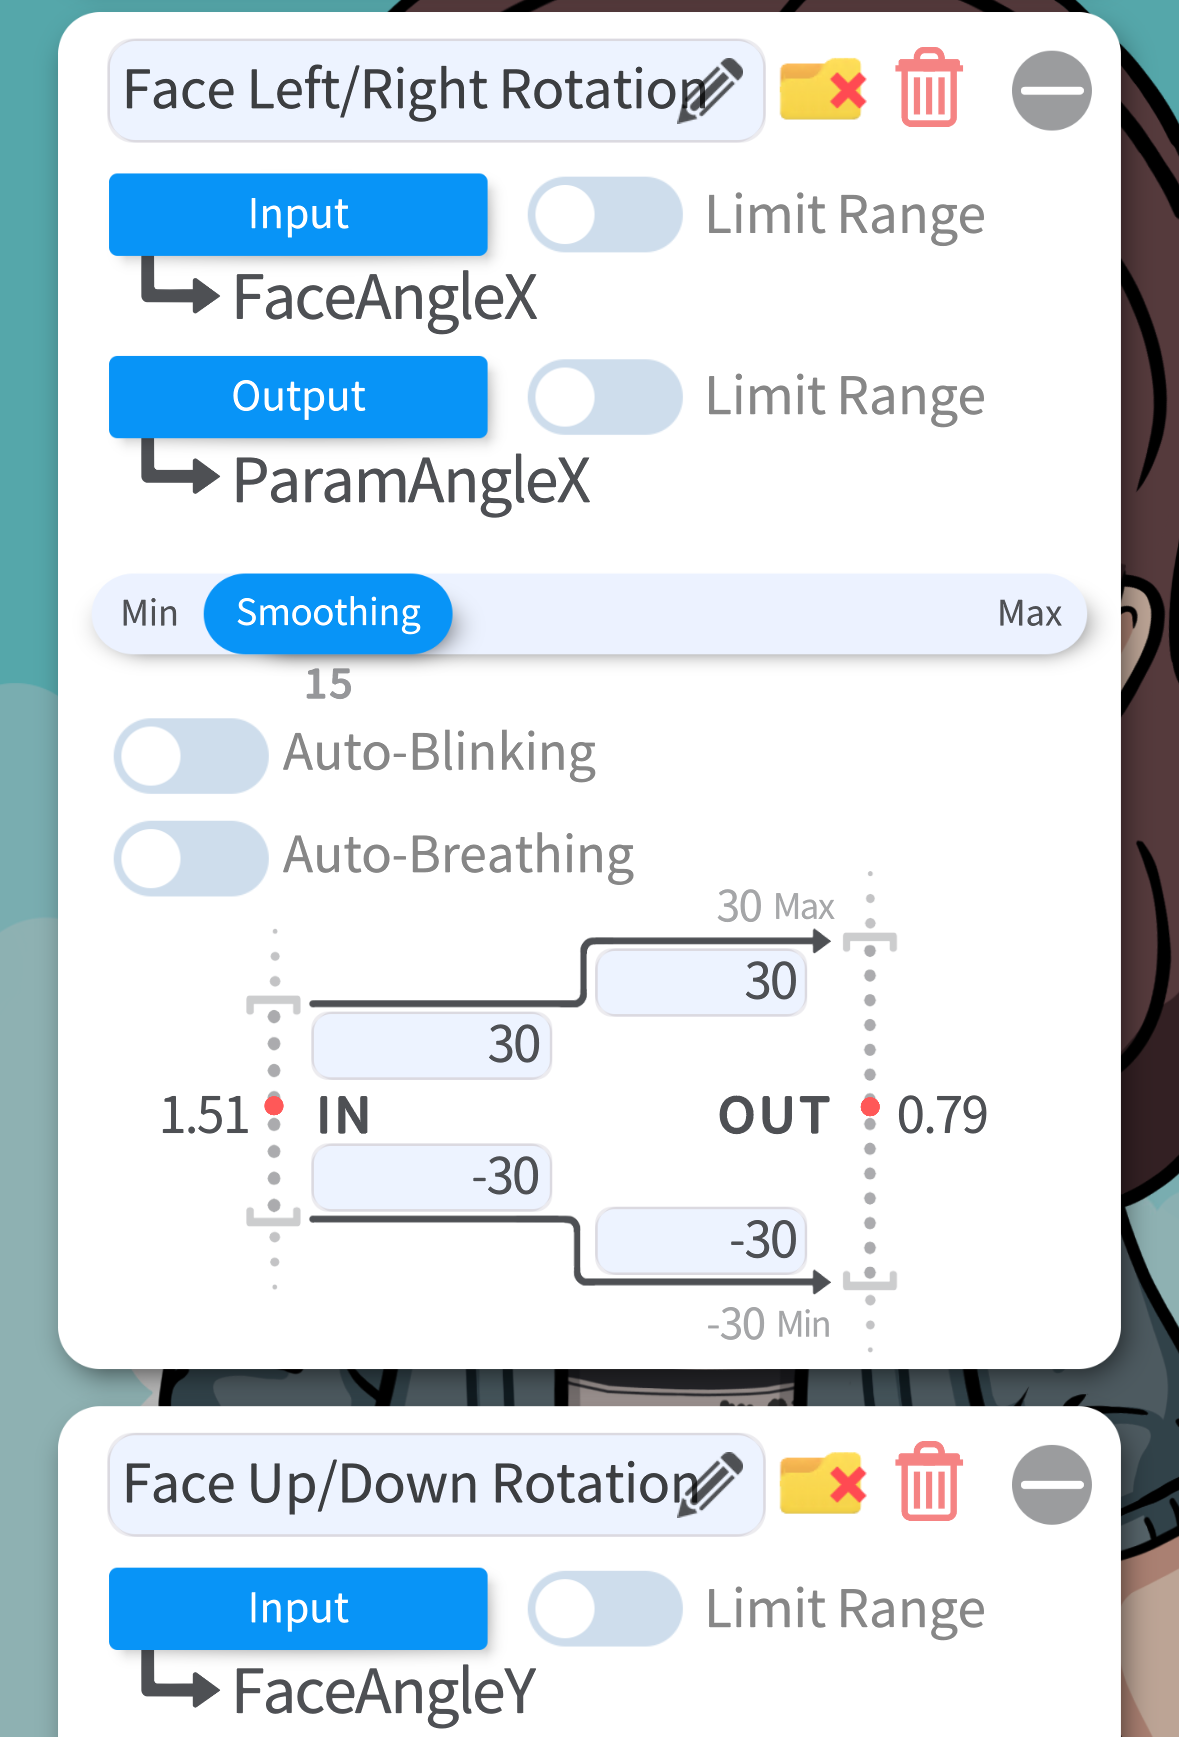
Once I was happy with the artwork they could then go onto rigging everything together, adding physics on the hair, but also adjusting how much the face moved, you can see on the left just how many little sliders there are.
Putting it all together
To actually get this mapped to my face I use an app on my iPhone called Live2D Studio, it uses the face tracking in FaceID to track your face. You can connect the iPhone app to the Steam app to get it as a source on OBS, but still using the FaceID tracking (it’s a lot better than a webcam would be). The file Airy sent me just had to be imported into the app.
Initially it wasn’t very reactive (I apparently don’t open my mouth wide enough), so I did have to play around with the settings.
I’m definitely still learning about VTubing and I don’t intend for it to replace my actual face, but I think it’s a fun way to add Face Cam to videos without having a proper setup and hopefully still be engaging. I’ll see you in the next video!